Introduction
The hype for Machine Learning, Deep Learning and AI is in its peak. Right in the middle of that, Apple provided developer community with tools to run trained models on its hardware. It is a pretty big deal as earlier there was no way for engineers to easily deploy such applications on multiple physical devices. We thought it would be nice to have our turn with the CoreML and so the iOS and Data Science decided to team up. Therefore we decided to go the extra mile and present our full pipeline from model conversion using coremltools python package to actual iOS implementation. Let me guide you through our journey. To follow, you are going to need Xcode 9, device with beta of iOS11 installed (simulator won’t do as camera has to be accessed) and python 2.7 installed on your Mac (it should be by default just as python).

Caffe and Python introduction
First we have to find and convert trained model to .mlmodel format. We got ours from Model Zoo repository, precisely from this project. Scroll to downloads section where you can find cnn_age_gender_models_and_data.0.0.2.zip file with everything we used here (about 86 MB download). Inside, there are 2 trained classifiers and some additional files. Model obtained from Caffe deep learning framework comes in 2 files: .prototxt and .caffemodel. The former one encodes an architecture for the neural network while the latter contains learned weights for a network connection. For further work we picked the Age Net (age_net.caffemodel, deploy_age.prototxt) and Gender Net (gender_net.caffemodel, deploy_gender.prototxt).
Let’s get our hands dirty. I won’t dwell too much on python environment details and converted models are included in the repository. I feel much safer using virtual environment for any python development. As far as I am concerned, anaconda is worth recommending. You can read more about this concept here:
– anaconda
Having our virtual environment set up (remember python 2.7 for coremltools, 3.0+ is not supported, been there, done that). Go to terminal and install coremltools and jupyter-notebook to code it in.
The two first commands install both of the needed packages using pip python package manager. Third runs jupyter-notebook environment which should open in your browser. If you are working inside a virtual environment, you should also add your local python kernel to available python kernels.
Now you are ready to create a new notebook using appropriate python version. Again, I don’t want to delve into details to much, as it is not the subject of this post. If you have any questions regarding python or jupyter environment, googling it out will probably yield pretty decent answers and you could always ask here.
Converting to .mlmodel
After setting up everything with python the rest is pretty straightforward.
It is the simplest and fastest implementation. We are not messing up with all the labels to make it looking beautiful in Xcode, but feel free to have fun on your own. The process is similar for other models. For example in Keras you have .h5 file defining the network, you just call coremltools.converters.keras.convert to proceed with some optional parameters like image_input_names and class_labels. Let’s look at deploy_gender.prototxt file.
This fragment defines the input of a neural network. I encourage you to take a look at .prototxt files, especially if you are familiar with neural networks. So we have an input called “data” and it’s sized 1x3x277x277. Without specyfing it as image_input_names we would have to deal with MLMultiArray, which is just multi-dimensional array implementation. As you know, we could pass an image to this classifier passing image_input_names=’data’ to the convert function proper input type. As for the class_labels, they are are basically plain text files, which contain names for prediction results separated by newlines.
Here I created labels for age classifier taken from model documentation. Raw classifier returns results as MLMultiArray of probabilities and we take max value as its prediction. We need age_labels.txt so our model can later output just what we need – readable prediction instead of probability numbers. Of course, you can get the numbers too if you need them. You can find all the files in the repository. After using save method on the model, it will create .mlmodel files in your script working directory. Next part is as easy as Apple promised- just drag .mlmodels to your Xcode project.
Using the model
What happens after you import model to Xcode? First and foremost, Swift code for interfacing with freshly created model. At this point you have no power to modify it anymore. All the parameters, even meta ones like author or various descriptions, have to be set up via coremltools. I imagine it’s a way for the original model authors to be attributed and mentioned but the current ecosystem is full of open-sourced models, which you have to convert yourself. Also, all generated class names are taken from .mlmodel file name so if you want your code to be nice and consistent, do name it in PascalCase.
What about the code which is generated for us? We’ve got 3 classes: YourModelInput, YourModelOutput and YourModel. Input and output are here for the things to be very swifty and safe, but those are more or less wrappers on the intended values. In our case input for both models is an Image of size 277 x 277. Unfortunately, it’s not UIImage or CGImage but CVImageBuffer which is raw pixel data (or to be more specific a pointer to it). Bad thing about it- we don’t have any tools, neither Apple’s nor open source to manipulate it in a good way. Our initial solution was to convert buffer to UIImage, manipulate and then convert it back to buffer. And it works. There is probably performance bottleneck here, but it was good enough as a quick and dirty solution. The output is an array of type MLMultiArray which contains probabilities for each predicted class and if we provided python script with class labels file, it also contains label of most probable class according to the predictive algorithm. Model class is used to make prediction. You can find all helper code in our repository.
Unfortunately, the described solution has its disadvantages, especially when it comes to a real time video processing. For each video frame we have to convert image to UIImage, scale and then back to CVPixelBuffer. Our modern hardware can handle it without too much fps loss of preview, but I consider it a waste and a really bad practice.
Enter the Vision
The new Vision API introduced recently, besides all marketed features, also allows to make predictions with your trained machine learning models. And you can pass either CGImage or CVPixellBuffer to it, which is nice. No additional conversion back to buffer is required. There are 2 main classes you need to know about. VNCoreMLRequest, which you initialize with the model and completion closure and VNImageRequestHandler containing in our case CVImageBuffer. Making prediction is as simple as calling perform method on VNImageRequestHandler object with array of VNCoreMLRequest as a parameter. Voila! No need for scaling and converting images over and over. Well played Apple, well played. The neat thing is that you can make many predictions in one function call, as in our case, to classify age and gender at once. Let me give you a little snippet and go to the repository for full code.
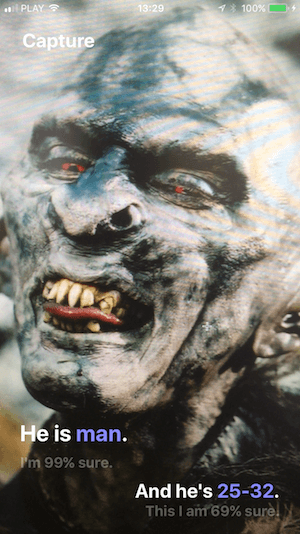
The prediction is returned in the form of a tuple (VNRequest, Error?) and you can get an array of probabilities using VNRequest results property. They are sorted descendingly, so first element in an array is our prediction result wrapped in VNClassificationObservation class. Two properties are worth noting here. Identifier contains label and its confidence` probability. From here you can update your UI, but just remember you do it on main thread when using live camera feed, as we did here. It isn’t obvious, but camera and its feed work in a background thread. The above-described solution is little workaround to make one prediction for 2 classifiers work using VNImageRequestHandler. I didn’t manage to get into internals of Vision. Documentation is scarce at this moment, but I imagine (it might be a bug, we are still deep in beta) there is some state sharing between request. Requests created once as property did not work, same with different closures when initializing them. Current solution looks very quick and dirty, so if you find a better way to deal with it, please let me know.
Repository
All application code with helper extension and class you can find here.
Demo


Read also about Apple app clips, new feature for iOS 14.


